Our Bathroom Renovation: Designing for Us (and Saying Goodbye to the Bathtub)
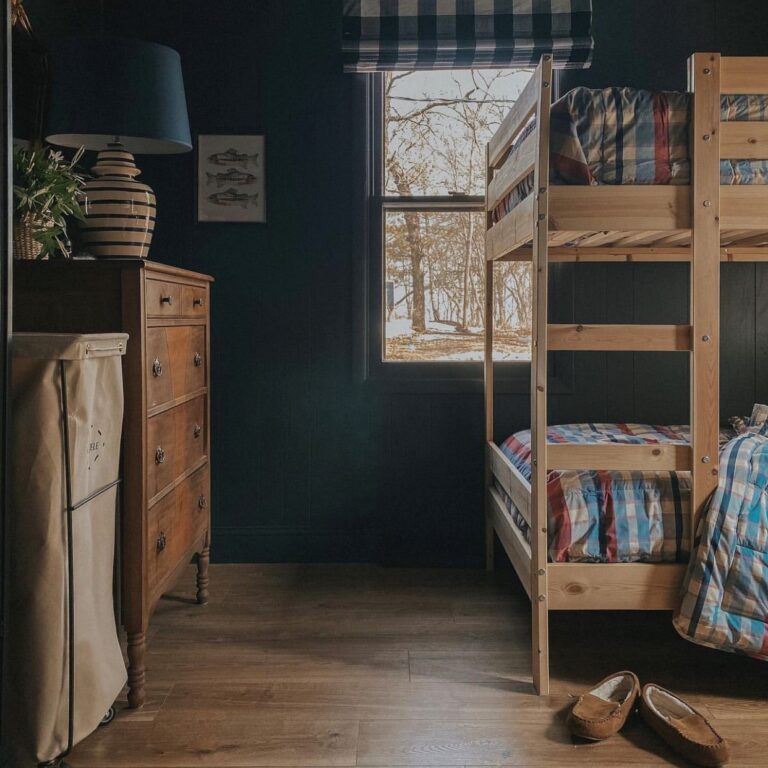
We’ve lived in our old 1880s farmhouse since 2014, and ever since move-in day, this main floor bathroom has been sitting there… taunting me. It’s the bathroom everyone uses — our guests, our kids (when they’re downstairs), and it also happens to be the one my husband, Derek, and I share. Yep. No bathroom in our bedroom. We’ve been making it work like civilized adults for years… mostly.
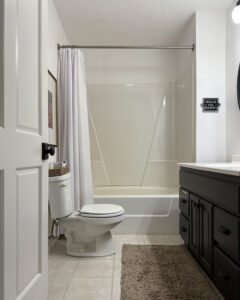
This renovation has been on the dream list forever. We wanted it to feel functional and beautiful. The “before” setup had a tub that forced the wall out in the weirdest way just to make it fit. So when it came time to finally redo it, we decided to open it all up and make space for a larger shower.
The Great Bathtub Debate
Here’s where I lost half the internet: we got rid of the bathtub completely. Yep. No tub anywhere in the house now. I can feel the collective gasp through the screen every time I say that.
People love to tell you what future buyers might want, but honestly, we designed this bathroom for us and how we live right now. I’m not taking imaginary buyers into account while I’m washing my face every night. (Also, let’s be real, no one’s buying a house based solely on whether you can soak in it like a human teabag.)
The Demo Days
Once we made peace with our tubless life, demo began. And let me tell you, there’s something wildly therapeutic about watching a 20-year-old tub get hauled out. Dust everywhere, drywall chunks in my hair, Derek pretending it’s all “under control.” It was chaos in the best possible way.
Finding the Perfect Tile
Now, here’s where the fun started — the design decisions. I was lucky enough to partner with The Tile Shop on this project. I went in knowing I wanted something timeless — not trendy, not fussy, just classic. Because we live in an 1880s farmhouse, it was important to me that the bathroom didn’t feel out of place. I wanted it to look like it could have always been there. So we went with classic subway tile in the shower, and marble on the floors for that touch of elegance and history. I didn’t know exactly which ones until I saw them in person — and that’s when everything clicked.
The Design Shift (a.k.a. the Moment I Changed My Mind… Again)
Once the bathroom was fully demoed and everything looked like a dusty construction zone straight out of HGTV’s “What Have We Done,” I decided to change gears a little. Because that’s what overthinkers do.
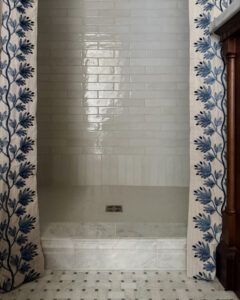
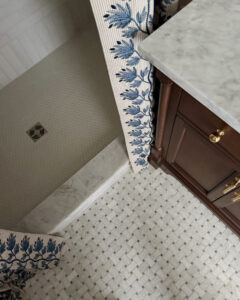
Originally, I had planned to just tile the shower walls — simple, clean, done. But then I saw this gorgeous idea from Kathy and Garrett over at The Grit and Polish, and suddenly I couldn’t unsee it. They had created a marble border that framed their shower like an architectural detail — a subtle, elegant way to make the shower feel intentional and built-in.
So, naturally, I hopped back in the car and made yet another trip to The Tile Shop. I found the most beautiful marble tile to create that surround, and once it went in — wow. It completely transformed the feel of the space. That border frames the shower like a piece of art.
And while I loved all my tile choices, I’ll be honest — picking grout was surprisingly hard. It feels so permanent! I didn’t want anything too stark white or too dark, so I landed on Vintage Ivory — the perfect soft neutral that ties everything together and gives the space that subtle, historic warmth.
The Vanity That Started It All
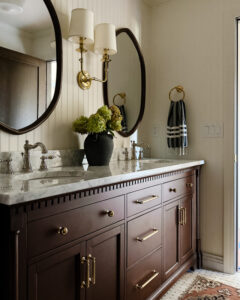
Once the demo dust settled (literally and emotionally), I found her. The vanity of my dreams. I knew I wanted a dark wood vanity with a marble top — something that looked more like a piece of furniture than a cookie-cutter bathroom cabinet. Something with character.
Then, while scrolling through Wayfair late one night— I found it: a gorgeous 72-inch dark wood vanity with beautiful detailing and marble top. I ordered it immediately, no hesitation. And honestly, once that vanity was in place, everything else just started to fall together.
Making It Fancy (Because Why Not?)
For this space, I wanted a touch of traditional elegance. Something that felt a little more fancy farmhouse, if that’s even a thing. (It is now.)
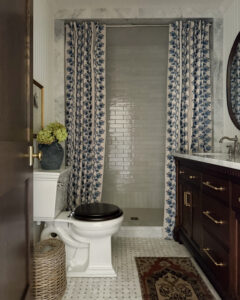
I found this gorgeous curtain from Ballard Designs that I repurposed as a shower curtain — and it completely elevated the whole look. It’s rich, classic, and made the space feel more like a boutique hotel than a small farmhouse bath.
Mixing Metals Like a Rebel
Next came the hardware and fixtures. I fell in love with unlacquered brass hardware from Rejuvenation, which has this amazing lived-in finish that will patina and age beautifully over time. It’s warm, timeless, and feels perfectly at home in an old farmhouse.
To keep things interesting, I mixed in polished nickel faucets — because why stick to one metal when you can have two? The contrast between the warm brass and cool nickel makes everything feel layered and intentional.
And listen — I am not a fancy designer. I don’t know any of the official “rules” about mixing metals (I’m sure there’s a long list somewhere involving undertones and finish sheens). I just knew that I loved these two together, and honestly? They looked really good side by side. Sometimes you just have to trust your gut — or in my case, your eyeballs.
I rounded things out with wood-framed mirrors and a statement sconce that has just enough quirk and craftsmanship to make you stop and stare.
Walls, Paint, and Lighting Magic
To make the space feel even more classic and finished, we added beadboard paneling to the walls — installed by my husband, Derek (shoutout to him for his precision and patience). It’s the perfect nod to our farmhouse’s history while still feeling fresh and polished.
We painted the walls Swiss Coffee by Benjamin Moore, which is the dreamiest creamy white — warm but clean, and soft without being yellow. It brightened up the whole room and pairs perfectly with the marble and wood tones.
For lighting, we actually went all out — and it makes such a difference. We added a recessed light inside the shower (game changer for visibility), a ceiling light for general brightness, and the sconce by the mirrors for a warm, flattering glow. It’s the perfect balance — bright enough to get ready in the morning, but cozy enough that it still feels calm and spa-like.
The “Pretty Toilet” Moment
Our toilet is front and center in this bathroom — there was truly no other layout option. So, I embraced it. I found what I like to call a “pretty toilet.” And yes, toilets can be pretty. This one has the most charming shape, clean lines, and I finished it off with a wooden seat to tie in the warmth of the vanity. I got rid of the handle the toilet came with and ordered one that had more detail. It’s those small details that makes the space feel cohesive — and honestly, it makes me weirdly happy every time I walk in there.
The Tile in all its Glory
Here is a detailed list of all the tile used in this renovation so you can recreate it when you do your bathroom!
Flooring : Meram Blanc Carrara Polished Niles with Grey Marble
Baseboard: Meram Blanc Carrara Polished Skirting
Shower: Tribeca Gypsum White Porcelain Wall Tile Shower floor: Penny Round Light Grey Gloss Porcelain Mosaic Shower border: Bianco Colorato Polished Marble 8”x20”
Niche inside: Bianco Colorato Polished Marble 12”x24”
Niche pencil: Meram Blanc Carrara Polished Somerset Marble .625”x12”
Grout: Ardex FL Antique Ivory Sanded
The Finished Space
This bathroom, start to finish, took us two months — from demo to final wipe-down — and we could not be happier with how it turned out. It is seriously everything I dreamed of. It’s gorgeous. I almost feel like I shouldn’t use it, but, well… we kind of have to.
Every time I walk by, I can’t help but stop and stare. It’s one of those spaces that makes me think, “Wait, this is OUR bathroom? The kids have even asked to use it, and I said, “Nope! You’ve got your own bathroom upstairs.” (Okay fine, I told them they can use it on holidays. Like Christmas. Maybe.)


")


We may receive a small affiliate commission when you purchase through our links, this is at no cost to you.
Thank you so much for reading and supporting Rignell Ranch!